

Removing the Webtrends App from a Single Site Collection
Due to the use of a User Custom Action to enable tracking on classic sites, or on modern sites that allow custom scripts, and the inability of the deploy process to alter these, you must first retract the add-in prior to deleting it from the site.
Failure to first retract the add-in may result in an orphaned user custom action and unnecessary WebtrendsAssets library on your site collection.
Contact Support for assistance in removing these.
- Navigate to the desired Site Collection.
- Open site Settings (the gear icon in the upper right).
- Open the Site contents.
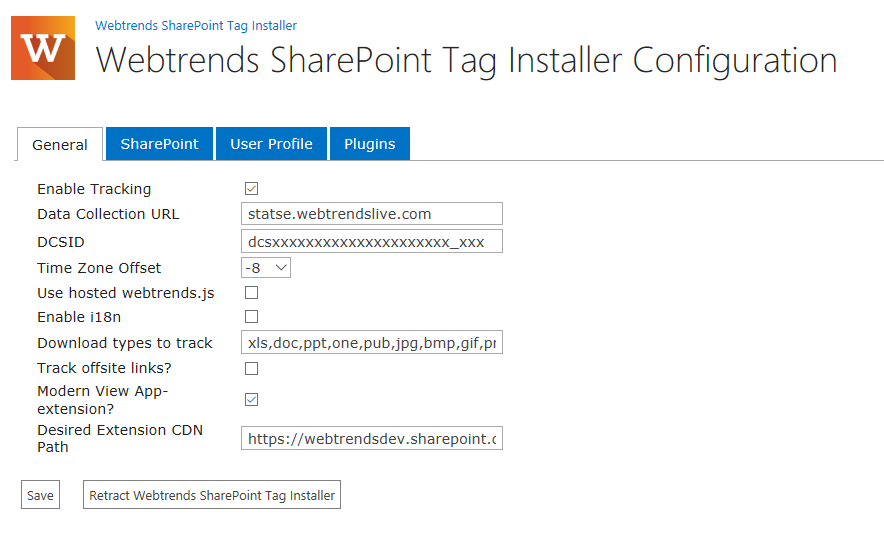
- Click the icon for Webtrends SharePoint Tag Installer.
- Click the Retract Webtrends SharePoint Tag Installer button.
 Note:
Note:This will remove the User Custom Action and delete the WebtrendsAssets document library from the site contents page.
-These are only installed on classic sites, or modern sites that have the Allow custom scripting option enabled.Note:If Retract Webtrends SharePoint Tag Installer is not visible, verify Enable Tracking is unchecked and click Save to ensure that a retraction has taken place.
- Return to Site contents
- Switch to classic experience if necessary.
- Hover over the Webtrends SharePoint Tag Installer icon.
- Click the ... link in the upper right.
- Click DELETE in the hover card.
- Repeat for additional site collections as needed.
Removing the Webtrends App from Multiple Site Collections
Due to the use of the User Custom Action to enable tracking on classic sites, or on modern sites that allow custom scripts, and the inability of the deploy process to alter these, you must first retract the add-in on each site collection prior to undeploying via the managed paths.
Failure to first retract the add-in may result in an orphaned user custom action and unnecessary WebtrendsAssets library on your site collection.
Contact Support for assistance in removing these.
- Navigate to each desired Site Collection.
- Open site Settings (the gear icon in the upper right).
- Open the Site contents.
- Click the icon for Webtrends SharePoint Tag Installer.
- Click the Retract Webtrends SharePoint Tag Installer button.
Note:This will remove the User Custom Action and delete the WebtrendsAssets document library from the site contents page.
-These are only installed on classic sites, or modern sites that have the Allow custom scripting option enabled.Note:If Retract Webtrends SharePoint Tag Installer is not visible, verify Enable Tracking is unchecked and click Save to ensure that a retraction has taken place.
- After the add-in has been retracted from all site collections, navigate to the tenant app catalog
- Open site Settings (the gear icon in the upper right).
- Click on Site contents.
- Switch to classic experience if necessary.
- Hover over the icon for Webtrends SharePoint Tag Installer.
- Click the ... link in the upper right.
- Click DEPLOYMENT
- Remove the desired sites from the Manage App Deployments options.
- Save the change.
Removing the Webtrends SharePoint Tag Installer Package.
- Navigate to the SharePoint tenant app catalog site.
- Click Apps for SharePoint.
- Right click on the Webtrends SharePoint Tag Installer row.
- Click Delete.
- Confirm the deletion.