WebtrendsSDK Reference
The Webtrends SDK is a library for iOS that enables integration with Webtrends Analytics. This guide will walk you through the initial setup process, from integrating the SDK with your project, to sending events to Webtrends.
Installation via Github
The repository can be found here: https://github.com/Webtrends/ios-sdk.
Installation via CocoaPods
CocoaPods is the dependency manager for Swift and Objective-C Cocoa projects. It automates and streamlines the process of integrating libraries such as the Webtrends SDK into your project.
Step 1 – Install CocoaPods
If you’ve never used CocoaPods, you’ll need to install it first. It’s distributed as a ruby gem, and can be installed from the Terminal as follows:
$ sudo gem install cocoapods
Step 2 – Create a Podfile
Cocoapods uses a file called Podfile to manage third party code associated with a project. In your project’s base directory, run the following commands in Terminal:
$ touch Podfile
$ open -a Xcode Podfile
Now that the Podfile has been created and opened, we’ll add the information we need to install. First, tell the Podfile where to get the SDK. This step is not strictly necessary, but will ensure that you are receiving the validated production code from Webtrends. Add the following lines to your Podfile:
source 'https://github.com/CocoaPods/Specs.git'
source 'https://github.com/Webtrends/ios-sdk.git'
Next, select the components you need for your application by including the snippet below:
pod 'Webtrends-SDK/Core', '~>4.0'
Step 3 – Install
Once your Podfile is saved, you’re ready to actually install Pods using the following command, still from your project’s root directory:
$ pod install
This process will create a new file in your root directory called [Project Name].xcworkspace. Open your project from that file from now on, rather than the .xcodeproj that was used before.
Step 4 – Set up webtrends.plist
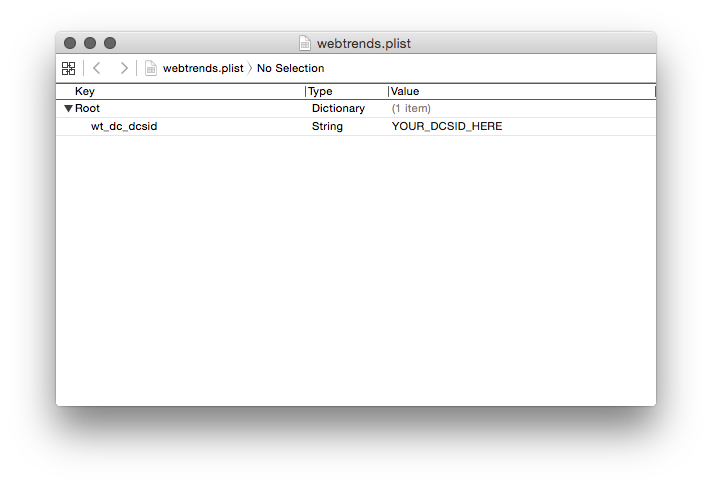
You can download an example copy of a webtrends.plist here. Add the file to your project, open it, and replace YOUR_DCSID_HERE with your unique DCSID. There are many configuration options available to be specified in the webtrends.plist, but the only required setting is the DCSID.
Required Entries:
wt_dc_dcsid: Your Webtrends Analytics DCSID for this application

Additional Swift Setup
Once the Webtrends Pod has been set up, you’ll have to import the SDK to integrate the library into your Swift-based application’s bridging header file. If you’ve never worked with bridging headers before, follow the directions for manually creating one from Apple’s Using Swift with Cocoa and Objective-C guide.
In a nutshell, you will need to create the bridging header in your application project, tell the compiler where it is, and update the search path to find the header files in the SDK.
In your bridging header, simply add the following line, which will make the entire core Webtrends SDK available to your swift app:
@import Foundation;
#import "WebtrendsSDK.h"
To actually use this header we need to tell the Swift compiler where it is, so open up your project’s build settings and find the Swift Compiler — Code Generation section. Change the project-level setting for Objective-C Bridging Header and change the value to point to our new header (e.g. YourApp/Bridging-Header.h for a project called ‘YourApp’).
Finally, tell the compiler where to find the header files you will be using in the bridging header. Find the section called Search Paths and change the project-level setting for User Header Search Paths, adding a recursive entry for the Pods directory. The entry will look like Pods/**.
Step 5 – Start logging events
Once your webtrends.plist file is in order, you’re ready to start logging events. In its default configuration, Webtrends SDK logs nothing. Lifecycle events can be logged automatically by setting the wt_dc_automatics_enabled config setting to true. Manual events may be logged by calling the event trigger methods in the WTDataCollector class. To manually log events of your own, use any of the triggerEvent methods documented in WTDataCollector.
Common Actions
The documentation below has detailed explanations of the entire SDK, but for convenience, this guide provides sample code for a couple common actions you might take with the SDK, such as triggering events, setting configuration settings, and pausing/resuming event sending.
Triggering Events
If automatic events are enabled, many events are triggered automatically on your behalf. In most cases you won’t need to do any additional work to receive events related to the application or view controller life cycles. You can read more about this in the Automatic Events Guide.
If you want to manually log events, the process is pretty simple. Here’s an example of how to send an event associated with a button press:
Swift
// eventPath can be nil if you want to use the default eventPath
let meta = WTEventMeta(eventPath: nil, description: "Sign-in button tapped!", type: "Tap Event", customParams: nil)

// Once we've set up our basic information, pass it to the data collector
WTDataCollector.sharedCollector().triggerEventForAction(meta)
Objective-C
// eventPath can be nil if you want to use the default eventPath
WTEventMeta *meta = [WTEventMeta eventMetaForPath:nil description:@"Sign-in button tapped!" type:@"Tap Event" customParams:nil];

// Once we've set up our basic information, pass it to the data collector
[[WTDataCollector sharedCollector] triggerEventForAction:meta];
There are a wide variety of events you can trigger, all of which are documented in the Manual Events Guide.
Setting Configuration Settings
Webtrends provides a wide variety of configurable options that you can use to customize how the SDK behaves. Here’s an example of how to disable Webtrends debug logging programatically:
Swift
WTDataCollector.sharedCollector().setValue("false", forConfigKey:kWTConfigDebug, persists: true)
Objective-C
[[WTDataCollector sharedCollector] setValue:@"false" forConfigKey:kWTConfigDebug persists:YES];
For a full list of configurable settings, see the Analytics Advanced Configuration Guide.
Pausing/Resuming Event Sending
Here’s an example of how to pause then resume event sending:
Swift
WTDataCollector.sharedCollector().pause()
WTDataCollector.sharedCollector().resume()
Objective-C
[[WTDataCollector sharedCollector] pause];
[[WTDataCollector sharedCollector] resume];